Friday 10 December 2010

Grandma's Apple Taart

In the Netherlands, you don't have yiayias, you have omas. "Oma" is the Dutch word for grandma and the Oma's appel taart is a true Dutch delicacy. As I currently live away from my home country, I thought it appropriate to take a peek at what the Dutch have for us in terms of the traditional recipes, made famous by a generation of grandmothers whose lessons are sadly being forgotten. 


You will be hard pressed to find a dutch cafe that doesn't offer you koffee en gebak and it will always be a tempting looking apple tart. At every birthday party I attend here in the Netherlands, there is always a slice waiting for you. 


So, it's a real crowd pleaser and definitely one for the winter months. Thus, I urge you to make it and invite your friends and family over for koffie en gebak. 


Ingredients:


For the dough:
300g self-raising flour
150g caster sugar
175g (salted) butter
1/2 egg (save the rest for brushing the pastry)


For the filling:
1 kilogram apples (hard, sour ones), halved and sliced thinly or in sticks
75g raisins (soaked in water)
75g granulated sugar
2-3 teaspoons cinnamon (mmmmm)
juice of half a lemon


And some toasted bread crumbs to make sure the cake does not stick


Instructions:


Butter a round cake tin and sprinkle the bread-crumbs to line the tin. 


Combine all of the ingredients for the dough and work until smoothly combined. Wrap in cling-film and leave in the fridge. 


Now combine the ingredients for the filling in a bowl. 


Retrieve the pastry from fridge and roll it out to form the sides and bottom (for this I usually use the bottom of the cake tin as a guide. Then spoon the filling into the tin. Now roll out the rest of the pastry and make a thatch pattern on top, or alternatively a pattern of your choice. 


Brush with the remaining egg half and then pop it in the oven for 1 hour and 15 minutes at 175°C.


Serve with whipped or pouring cream and a sprinkling of icing sugar for decoration.


Friday 3 December 2010

Yiayia's Yiouvarlakia (Γιουβαρλάκια Γιαγιάς)

It has taken me a while to really get the right inspiration for this blog, yet I think I have finally cracked it! I realised that living abroad makes you miss the really homely things in life. One of these things for me is my yiayia's cooking. Yet in many ways, being away has brought me closer to my culture than ever before. Me and my yiayia speak regularly now on the phone about recipes, and I am always calling her for inspiration when I can't decide what to cook. After all, she is the expert on feeding people well! 

Now, everyone probably thinks that their yiayia is the finest cook in the world and I am no exception. Somehow yiayia's manage to pack in a special ingredient (for scientific purposes I'll call it the 'yiayia factor'), which I believe is only available to you when you yourself become a yiayia. Even if you copy their instructions step-by-step, theirs will always taste better.

I want to keep these recipes alive, share them; their taste, their tradition, their ability to bring family together.

For me, my favourite food is an easy choice; Avgolemoni (Egg and Lemon soup). This soup is always different depending on whose family makes it and I have experience the good, the bad and even the ugly. So you should by now know what I am going to say...yes my yiayia's one is the most delicious. However, this recipe is not for Avgolemoni. This recipe is for Yiouvarlakia (Egg and Lemon soup with meatballs). It so reminds me of being in Cyprus, in a little traditional restaurant during the old days when Nicosia was not yet home to swish bars, starbucks and sushi. The recipe originally comes from Greece and my dad swears that his yiayia (my great grandmother) made the nicest one (what a surprise!) 

Ingredients: 

250g lamb mince
1 onion grated
100g rice 
hanful chopped parsley
2 eggs (yellows and whites separated) 
juice of 2 and a half lemons 
3 litres chicken stock 


Mix the onion, parsley, rice and lamb mince with some salt and pepper in a bowl until well combined. 


Roll into small balls, then fry them for in some olive oil until they are browned.


Add the chicken stock and simmer for about 30 minutes, then leave aside to cool a little. 


In a large bowl, whisk the egg whites a little (you can use an electric whisk) and then add the yellows. Keep whisking all the time and then add the lemon juice. Now add half a cup of water and (as I said before) don't stop whisking. Now add a ladle at a time of the stock from the pan into the bowl whilst whisking. When the bowl becomes warm you can stop whisking. 


Now slowly, whilst stirring, pour the contents of the bowl back into the pan. Stir well and leave. You can warm the soup a little when you are ready to eat but do not boil it again as the egg may curdle. 


Enjoy! 

Saturday 20 November 2010

Zesty Prawns

This recipe is really easy and super fast to make. I decided to make it with some black bean rice, nachos and guacamole, but it could also be served with some salad or crusty bread and advocado. The result is a refreshing and delicious dish that is appropriate for any occasion, especially those when time is short. 


Ingredients:

250g fresh or frozen (thawed) prawns
1 red chilli finely chopped
1 clove garlic
1 tablespoon fresh ginger grated
Salt and pepper
Handful fresh coriander chopped
Juice of half a lemon or lime


In a pan, fry the garlic, chilli and ginger with some olive oil for about a minute and then add the prawns. Fry for a further 4 minutes and season with salt and pepper. Turn off the heat and stir through the coriander, lemon juice and a drizzle of olive oil.

Wednesday 17 November 2010

Indian Chicken Patties with Pea Flatbreads

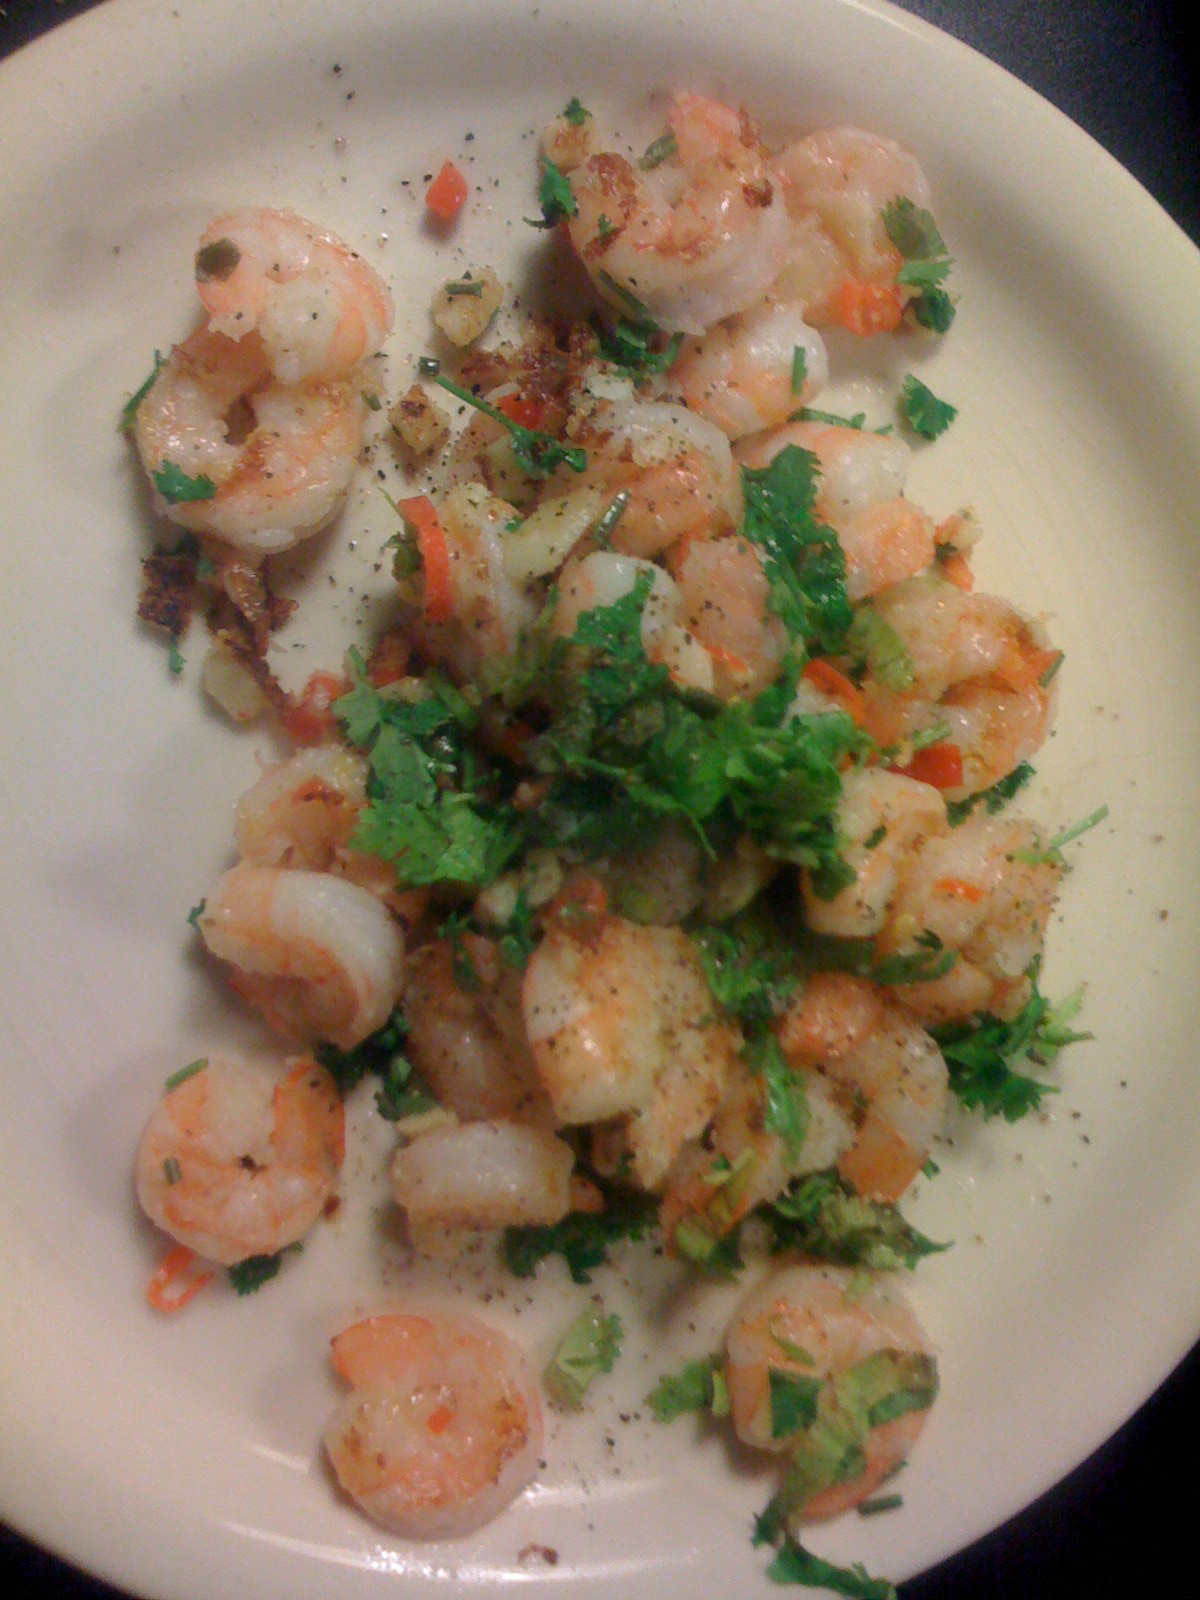
In the early hours of this morning we went and watched the premier of Harry Potter. This meant staying up through the early hours and so I decided to try something new (as I had a lot of time) and have a late dinner. So, I had some chicken mince which I had purchased from the poulier on Saturday and thus came up with the idea of some chicken patties with flatbreads. 

It was really good eating and very well received by others. The thing I like the most is how sociable it is and thus it would be perfect for a casual dinner party. Eating with your hands always gives a different atmosphere to a meal, one of comfort and respect for others.


Ingredients:

For the flatbreads:

1 and a half cups flour
Three quarters of a cup of water
Salt
2 tbsps oil and a pastry brush
150g fresh or frozen (thawed) peas
1 tsp turmeric
1 tsp cumin
1 tsp ground ginger
1 tsp coriander seeds

For the patties: 

250g chicken mince
1 onion grated finely (watch the eyes)
Handful of chopped fresh coriander
1tsp harissa
1tsp coriander seeds
1tsp cumin
Bread crumbs (I made my own from toasted sourdough bread and used about 2 pieces of bread) 
Salt and pepper

For the cucumber yoghurt dip:

A quarter of a cucumber grated
Half a cup of plain Greek yoghurt
1 clove garlic crushed

In a pan, add a tablespoon of oil and fry the peas with the spices softly for a couple of minutes, taking care not to burn them. Add small amount water and turn up the heat a little. Put a lid on the pan and cook for around ten minutes, checking and stirring often to ensure the peas do not burn. If more water is needed then add a little more but not too much. 

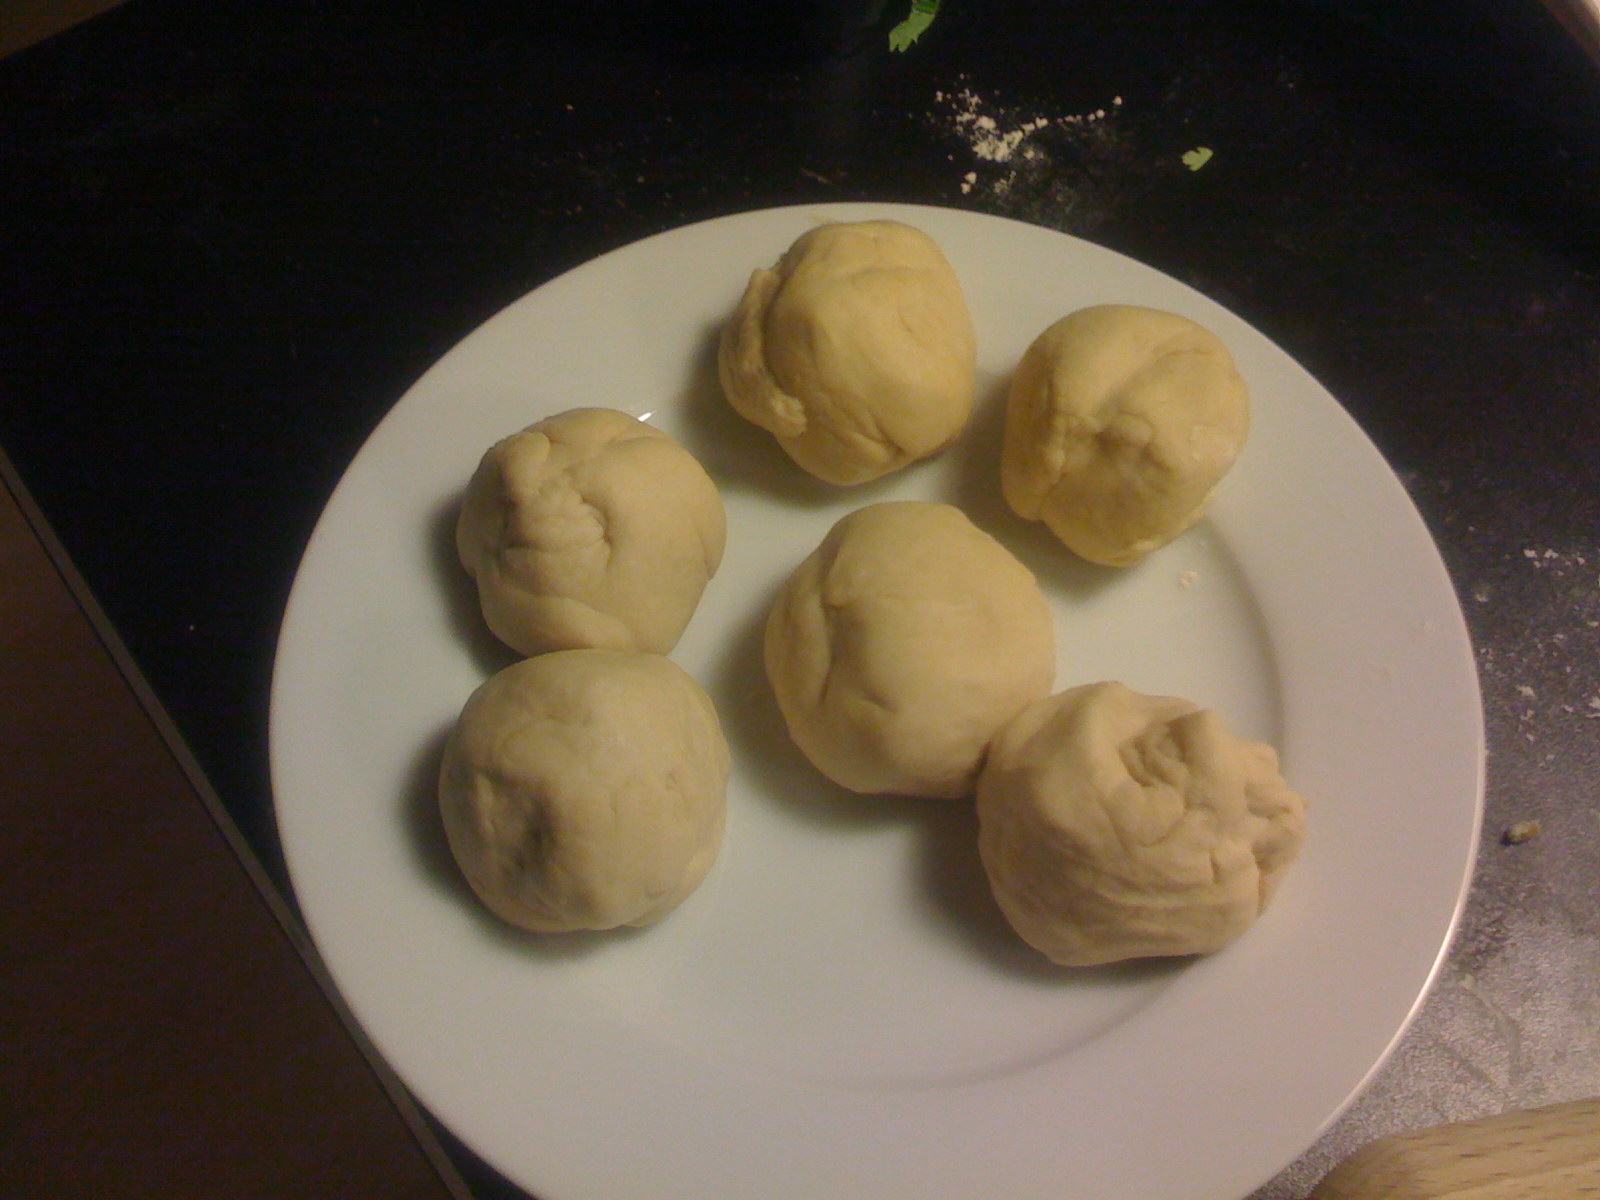
Meanwhile mix together the flour, some salt and water in a bowl and blend together with your hands. Turn out onto a floured surface and work as you would do a bread dough, kneading for around 5 minutes. The dough should not be sticky so that it sticks to your hand or too dry that it crumbles, so add more water of flour accordingly. Roll the ball into a large ball and leave aside in a bowl. 

Now take the lid off of the peas and mash them with a mashing tool or alternatively you could put them through the blender. Then leave them with the lid off so that the pea mix can dry out a little. Then put the mix onto a plate and leave. When it is mouldable, form 8 small balls from the pea mixture. 

Now in a bowl, mix together all of the ingredients for the chicken patties. Place the bowl in the fridge to firm. 

Take the ball of dough and split it into 8 equal parts, rolled up into balls. Take one ball and roll out into a small disc (about as large as the bottom of a wine glass). Place one of the pea balls in the middle and then close the dough around the pea, as though you are making dumplings. Then roll the 'dumpling' out into a roundish flatbread shape. 

Heat a pan and place one of the flatbreads on top. Small bubbles will start to form and after about 30 seconds, turn the flatbread over. Using the pastry brush, brush a little oil over each side and keep turning backwards and forwards for around 4 to 5 minutes or until it looks done. The repeat this process for all 8 flatbreads and then leave them aside.

Remove the chicken mixture from the fridge. Now in another pan, warm some oil and one by one roll up small chicken patties and place them in the pan. Cook them over a medium heat, turning them often so that they brown on all sides. They will need about 20 minutes but do check by cutting one open first before you serve them. 

Finally mix the ingredients for the yoghurt together. This should be more runny than a tzatziki as there is a larger amount of cucumber than yoghurt. This is so that it pours rather than dollops. 

Serve with a salad and fill the flatbreads with the chicken patties, yoghurt and salad. Enjoy! 


Sunday 14 November 2010

I Pealeaf in Risotto

So, this week has been a bit of a risotto fever week :) Personally, I think it must be because my friend visited at the weekend and kept talking about risotto. Thus, she planted the idea, which essentially one could say has taken over. 

This one, my 'Pealeaf' risotto (a mix of peas and leaves) was something I had not previously tried but I must say it is one of the nicest ones I have had, very delicate and very delicious too. Perfect for any vegetarians, but even if you are a meat lover then you definitely won't miss out on any flavour. 

I have a wonderful large copper pan, which I use for all the risottos that I make. If you ever want to invest in something invaluable to your culinary development then may I suggest one to you. Not only is it perfect for cooking risotto, it also feels so homely and authentic when you are using it. On this occasion I also used a new risotto rice, which I had previously not tried, and I have to say it was very good. 


Ingredients:

1 onion chopped
2 stalks celery thinly chopped
1 large garlic clove crushed
250g risotto rice
125ml white wine
2 handfuls mixed leaves
1.5 litres of vegetable stock
150g frozen peas
50g parmesan grated
knob of butter

In a heavy bottom pan, fry the onion softly for about five minutes, taking care not to brown it. Add the garlic and celery and fry for a further 5 minutes. Add the risotto rice and fry for one minute on a medium heat. After the minute has passed, pour in the wine and stir. 

Now add the stock, little by little, watching and stirring until each amount of stock is absorbed by the rice. Continue doing this until the stock is finished or until the rice is soft but with a little bit of bite (or however you like it). 

Next add the peas and continue to cook for two more minutes. Turn off the heat and stir almost all of the mixed leaves through the risotto. The leaves should wilt and as this happens you can add the butter and keep stirring. Finally add the grated parmesan and stir it all together so it is mixed up well. Season with salt and pepper and then serve in bowls with a few leaves perched on top.


Saturday 13 November 2010

Salmon en croute

Salmon en croute is one of my favourite dishes and is both comforting and easy. As a child I remember eating this after school for dinner and I always thought it was fantastic. This is one of my yiayia's favourite things to eat that she doesn't cook herself. When she is fasting, she often eats this if she is allowed only fish. 

Every Saturday there is a fresh fish market near my house and I make a point to make something with fish for dinner. It always looks amazing, all the different fish laid out on display. The smell of them frying the fish for you to enjoy immediately is captivating and I can never resist. Anyway, on Saturday I always make a point of  buying some nice fresh catch and cooking it for dinner. Salmon en croute can be made using puff pastry or crumbly pastry and both are equally delightful. This recipe uses puff pastry because it is light and easy. This dish is great served with broccoli and/or mash potato. 


Ingredients: 

4 salmon fillets without skin
About 8 sheets puff pastry
2 leeks sliced thinly
Half a piece of fresh fennel thinly sliced
1 onion finely sliced in half rings
50g butter
2 handfuls dill
1 egg whisked

Fry the onion in a pan with a little olive oil over a low heat, stirring so that they do not brown. After 5 minutes add the leek, fennel and butter and fry for about ten minutes over a low heat to simmer. Finally add the dill and stir through and season with salt and pepper. Turn off and set aside. 

Preheat the oven to 200°C.

Roll out the puff pastry and place the salmon fillets on top of one piece of puff pastry each. Now spoon a little of the leek mixture on top of each of the salmon fillets. 

Now carefully place another filo sheet on top and press or roll up the sides so that they are sealed. You may need a little more pastry depending on how big your salmon fillets are. Using a pastry brush, glaze the filo with the egg mixture. Top with salt and pepper and place the pastry parcels on a baking sheet. Pop them in the oven for about 25-30 minutes. Serve with some nice steamed broccoli and boiled or mashed potato. 


Monday 8 November 2010

Pea, Prawn and Edamame Risotto

I love risotto and can guess that most people share my opinion. Risotto is a true labour of love and the more love you put in, the more scrumminess (I kid you not http://en.wiktionary.org/wiki/scrumminess) you get out. It is the kind of food that can make someone fall in love with you ;) so if you are looking to impress then this is the dish to do it with. 

When I make risotto, it is a little like an improvisation, a natural free form cooking where there is no recipe, no rules. That's the way I like it and, once you have perfected the basics, you can throw almost anything into a risotto (please be wise :)). In any case, it is hard for me to give you exact amounts, so where I do not measure, I will not include measurements for fear of impairing the recipe. Be free and cast all meticulous weighing aside, just add then taste, then add more according to what your culinary intuition is telling you. Most of all...be brave.

The secret to a good risotto is a good stock. Stock can either be made yourself beforehand (can be stored in the freezer) or bought as powder or cubes from the supermarket. My favourite stock is 'Marigold Swiss Vegetable Bouillon Powder' and it is available in Waitrose. Despite the fact that I currently live abroad, I insist people bring it for me when they visit or bring back pots of it when I visit the UK. This recipe is good for 4 people. 

Ingredients: 

250g prawns fresh or frozen (thawed)
2 or 3 handfuls of risotto rice per person plus one for luck (note: I have small ladies hands)
1 large onion finely chopped
2 stalks celery finely chopped
150g peas
100g edamame beans 
125ml dry white wine 
half a lemon and the zest
500ml vegetable stock in a separate pan on the heat
50g of grated parmesan
1 garlic clove crushed
couple of knobs of butter


Fry the onion with a good glug of olive oil on a low heat in a heavy bottom pan. Add the crushed garlic and fry softly for five minutes ensuring the onions do not brown. Then add the celery and fry for a further 4 minutes. 

Add the rice and stir for one minute before adding the wine. You should hear a good sizzle as the wine hits the pan. Fry for 1 minute. 

Now, get a soup ladle and pour one ladle of the stock into the pan. Keep stirring and watch as the stock is absorbed by the rice. When it is almost all absorbed add another and repeat this process until the rice is soft to the taste, yet still with a bite to it. Five minutes after you add the first ladle of stock, add the edamame beans. If you run out of stock then just add some hot water. It should take about 15 to 20 minutes until the rice is ready. 

Now add the peas and prawns and cook for a further 3 minutes. Then turn off the heat and add the parmesan, butter and a squeeze of lemon to the pan. Stir well and season with salt and pepper. 


Serve into bowls and sprinkle the lemon zest on top. Serve with crusty bread and enjoy! 

Sunday 7 November 2010

Sushi

Sushi has become a gigantic hit everywhere, especially in the big cities. I myself can't resist and very often can be found at lunch tucking into spider rolls and sashimi. I couldn't resist doing a post on this because, in actual fact, my yiayia is totally not convinced ;) However, my pappou is one hundred percent backing the sushi movement so maybe there is some conflict there!


So far, the best Japanese restaurant that I have had the pleasure of visiting was Donzoko in Kingly street, London, UK. From the outside it doesn't look anything special, but it is special. If you ever get the chance then make sure you visit this jewel of a place. What I like about this place is that it is not trying to be fancy, not trying to be posh, not trying to be fashionable. It is just really good food and also popular with Japanese people themselves (which is always a good sign). 


Over the last couple of years I have made sushi on a few occasions (image above). I love the delicacy and the way it looks so beautiful when it is all laid out on the table. Last year l and also attended a Japanese festival to see the experts at work and took part in a sushi making class (result in image below). 

The earliest form of sushi was funa-zushi, originally from Shiga and made with salted fish. Through the simplification of this process, sushi evolved into what it is today. Sushi is surprisingly easy to prepare. There are a number of different varieties e.g sushi rolls, scattered sushi, hand rolled sushi, boat sushi and pressed sushi. My favourite fillings are crab, salmon roe. Below are a few useful terms to know if you are a sushi fan. 

Maki-zushi = rolled sushi
Oshi -zushi = pressed sushi
Hako-zushi = box sushi
Chirashi-zushi = scattered sushi
Inari-zushi = stuffed sushi
Nigiri (or edomae)-zushi = rice 'finger' with a slice of raw fish on top
Hangiri (or sushi-oke) = mixing bowl made from bamboo
Makisu = sushi roll mat
Oshi waku = box used for pressed sushi

Soon I will do another feature on sushi and include some recipes. 

Friday 5 November 2010

White Bread Loaf

So today I thought I would put something quite simple up, which is useful for every week. It is a white bread loaf that goes great with an Autumn soup or stew. Bread is something that everyone can and should make themselves at least once in a while. It takes some perfecting according to your taste preference, yet after a few tries you will have nailed it.


Nowadays I think our bread has become far removed from what it once was. The mass produced loaves that you can buy in the supermarket are filled with what seems to be fluffy cloud content. Real bread should be denser and you can dunk it in olive oil or a stew without it disintegrating. 

Near my house is a windmill where they grind their own flour and the selection is endless; white, cornflour, rye, wholewheat and even their own mixes. I'm not expecting that you embark on a long journey to seek out a windmill, but try and find a good quality flour to use. For example, the company below make an organic flour range for Waitrose and still use some traditional milling methods:

http://www.marriagesmillers.co.uk/our_flour/index.html

Ingredients: 

450g white flour, plus extra for dusting
1-1.5 teaspoons of salt
7g of yeast
1 table spoon of good olive oil
300 ml of lukewarm water


In a bowl, mix together the flour, yeast and salt before adding the olive oil and the warm water. Combine well in order to form a soft dough. 

Flour a surface and then begin to knead the bread for a few minutes, I would say about 5 or more. The dough should feel soft and elastic. It should not be too sticky that it stays on your hands, or too dry that it cracks or crumbles. Add extra water or flour if necessary to achieve the correct consistency. 

Place the dough in a bowl and cover it will a towel or cling-film. Leave the dough in a warm place for an hour and a half. After this it should have grown in size. Take it out of the bowl and shape it into a well greased bread tin. Re-cover and set aside to rise a little while you preheat the oven to 200°C. 

After about 30 minutes, get a sharp knife and softly carve some diagonal lines over the top of the bread (see image). Then place the bread in the oven and bake it for about 30 minutes, or until it is golden brown. It should sound hollow when tapped. Turn it out onto a rack and leave to cool. 

Thursday 4 November 2010

Strawberry Cream Cakelettes

Recently it was the birthday of a friend of mine and so I decided that I wanted to make him some kind of delicious cake. My initial thought went to a classic Victoria sponge and so I went and collected the appropriate ingredients...well just cream and strawberries. 

However when I returned home I decided that I wanted to do something else and playing on my mind was my recent trip to Patisserie Valerie in London and all the lovely cream cakes on display there. Further, I was not sure about presenting him with an entire Victoria sponge and saying "There! Eat that!". After all, he does live alone. 

So instead I came up with a mini play on the Victoria sponge and I am pleased to say that it worked a real treat. This is what the British classic would look like if it were French. It is a lot of work to be honest but worth it in the end. 

This recipe should make four cakes. If you have another sponge recipe that you prefer then go ahead and use it. You can also make them as small or large as you like. 

Ingredients:

For the filling:
1/2 a punnet of strawberries (washed and halved) 
2 pots of double cream

For the sponge:
110g butter
110g caster sugar
110g self raising flour
2 large eggs (or 3 small ones)

For the spirals:
1 cup of caster sugar

You will also need one or two 28cm cake tins
Medium size round cutter shape or a large glass (around 7-8cm in diameter)
A wooden spoon with the handle oiled with some olive oil

Sponge:
From the sponge ingredients, blend the caster sugar and butter together. Then add the flour and eggs and combine well to form a smooth batter. Pour half the batter into one tin and half into the other (or cook each separately if you only have one tin). You should have a very thin layer in each tin. Cook each half for about 25 minutes in the oven at 200°C. 

They should come out golden and like sponge pancakes of about 1cm thick or less.  Cut out 4 circles from each sponge layer (think logistically before you cut) and lay them on a plate to cool. 

Cream:
Whip the cream in a bowl with a drop of vanilla essence. Whip until you can hold it above your head, without getting cream in your hair (be confident that you have reached this stage before you attempt this!). Set the cream aside. 

Spirals: 
From the spirals ingredients, place half of the caster sugar in a pan over a low heat and cook until it begins to go brown and gooey (keep stirring), then add the other half and keep cooking until you have a smooth caramel. Turn off the heat and let the caramel cool until it is mouldable, yet not runny anymore. 


If you have any problems with the spirals then there is an excellent tutorial available here: 
http://candy.about.com/od/phototutorials/ss/sugar_corkscrews_sbs.htm

Now, carefully take a spoon and scoop a bit of caramel. As the long threads of caramel hang, loop (or wind) them around the wooden spoon handle in a spiral shape. Then wait a moment until they are solid and then slip them off the end of the spoon handle. Voila! This sounds very difficult but it is actually very easy. Make a few spirals and then place the delicately aside. 

Assembly:
For the final assembly arrange four sponge circles on a plate. On each put a layer of cream and then arrange the strawberry halves around the outside, then put another layer of cream on-top. Repeat the same process (without the last cream addition) and then top with the sugar spirals. 


Phew! What a bother! Well worth it though :) 

Wednesday 3 November 2010

Tasty Tom Ka Gai

Last night I made a delicious version of the Thai soup; Tom Ka Gai. It was very warming on a cold Autumn evening, perfect after I had just returned from a beautiful (but extremely muddy) walk in the nearby fields. 

Not only did it taste divine, but it was ready in under 15 minutes so it is perfect for those evenings when time is short (or when you are just being lazy). At the moment everyone seems to be getting a cold, but I am sure this soup would send a cold running for the door! 

If you do not have lime leaves at home then you can use some lemon grass instead, however they are great for adding to curries and can be kept in the freezer. 

500ml coconut milk
250g fresh or frozen prawns (thawed for a couple of hours in water)
100ml boiled water with a chicken stock cube dropped in. 
150g thin rice noodles (soaked in water for 2-3 minutes) 
100g Shiitake mushrooms (roughly chopped)
100g bean shoots 
1 onion very thinly slice in half rings
Handful of fresh coriander (chopped roughly)
Tablespoon of turmeric 
1-2 red chillies (chopped finely)
2 cloves garlic (crushed)
juice of half a lime
5 fresh limes leaves (I always have these in my freezer) 

Add a small amount of wok oil or olive oil to a pan and fry up the onions until they have softened a little. Then add the garlic and chilli (and lemongrass if you are using it) and fry for about 2-3 minutes. Add the mushrooms and fry for a further minute, then the prawns and cook for a further minute. 

Now pour in the chicken stock and then the coconut milk, then add the turmeric and the fresh limes leaves and the lime juice. Leave to simmer for 2 minutes and then drop in the rice noodles and bean shoots. 

Simmer for another 2 minutes and then add half the fresh coriander. Stir to combine everything and then serve into bowls. Sprinkle the remaining coriander over the top and enjoy a delicious fiery and warming dish...no-one need know that it only took you a very small number of expendable minutes.